 |
| Now that you've gotten familiar with the Tools you have on your Desktop it's time to apply that knowledge into making a Text graphic. Don't forget that it's best to have Photoshop open in another window and toggle back and forth while you work your way through these tutorials. |
|
Select the You can now select your Font, Font Size and make any decisions about making it Bold or in Italics. You can also adjust the Leading (which is how close lines of type appear). This window also allows you to decide if multiple lines of text are Centered, Aligned Left or Right You should make sure that you have the Auto Kern and the Anti Aliased boxes checked. Once you've made those decisions, place your Cursor in the area at the bottom of the window and type the text you want. When you are finished click OK and the Text will appear on your Canvas. |
 |
| Use
the
|
|
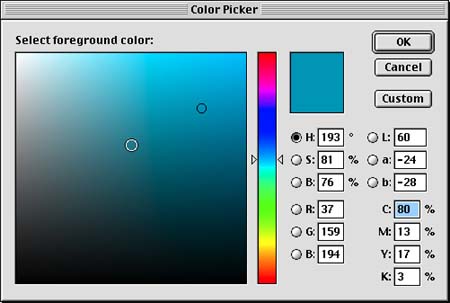
Or if you
double click on the  Foreground/Background colors, the Color Picker
window will appear. You can choose a color by moving the 'circle'
in the window.
Foreground/Background colors, the Color Picker
window will appear. You can choose a color by moving the 'circle'
in the window. |
 |
 |
Once you have picked the color of your text, and placed your text on the Canvas it's now time to Crop the image to the size that you want.
You now have a cropped text image. |
|
Before you save this
image you will need to Flatten the layers. |
 |
 |
Now go under Image and change the Mode from RGB to Indexed Color. |
| You're almost
done! Under File Choose Save As... and then save your
text image as a .gif |
 |
|
You should choose to save this image as Web Palette. You now have an Text Image for your Web page! |
 |
 |
If
you wish to make the background of your image Transparent you
will need to Export this image as a gif89a
|
Congrats! You've now created a text image for your web page!
![]()
Web
Building tutorials: Intro |
Fonts | Backgrounds
| Lists | Layout
| Tables | Graphics
| FTP
Photoshop
tutorials: Getting Started
| Text | Backgrounds
| Filters | Icons
| Photos & Scanning
Fireworks
tutorials: Getting Started | Paths,
Objects | Fills, Strokes, Effects
| Text, Effects | Import/Export
| Image Map | Slicing
| Behaviors | Putting
it all together